
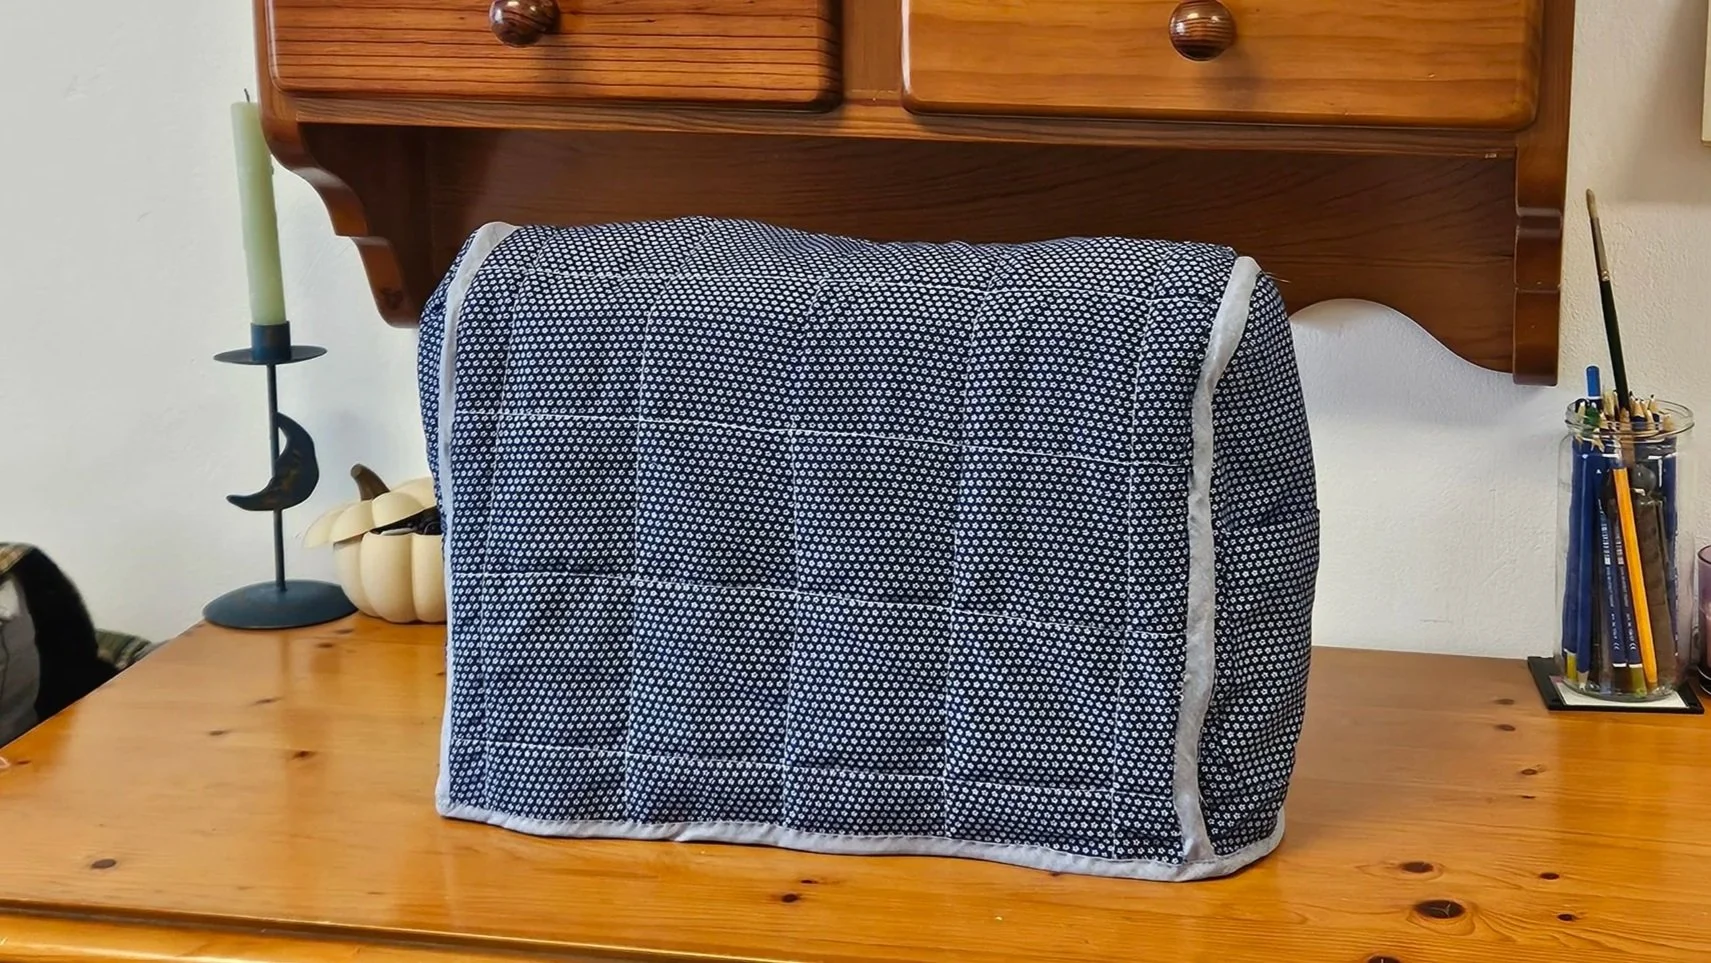
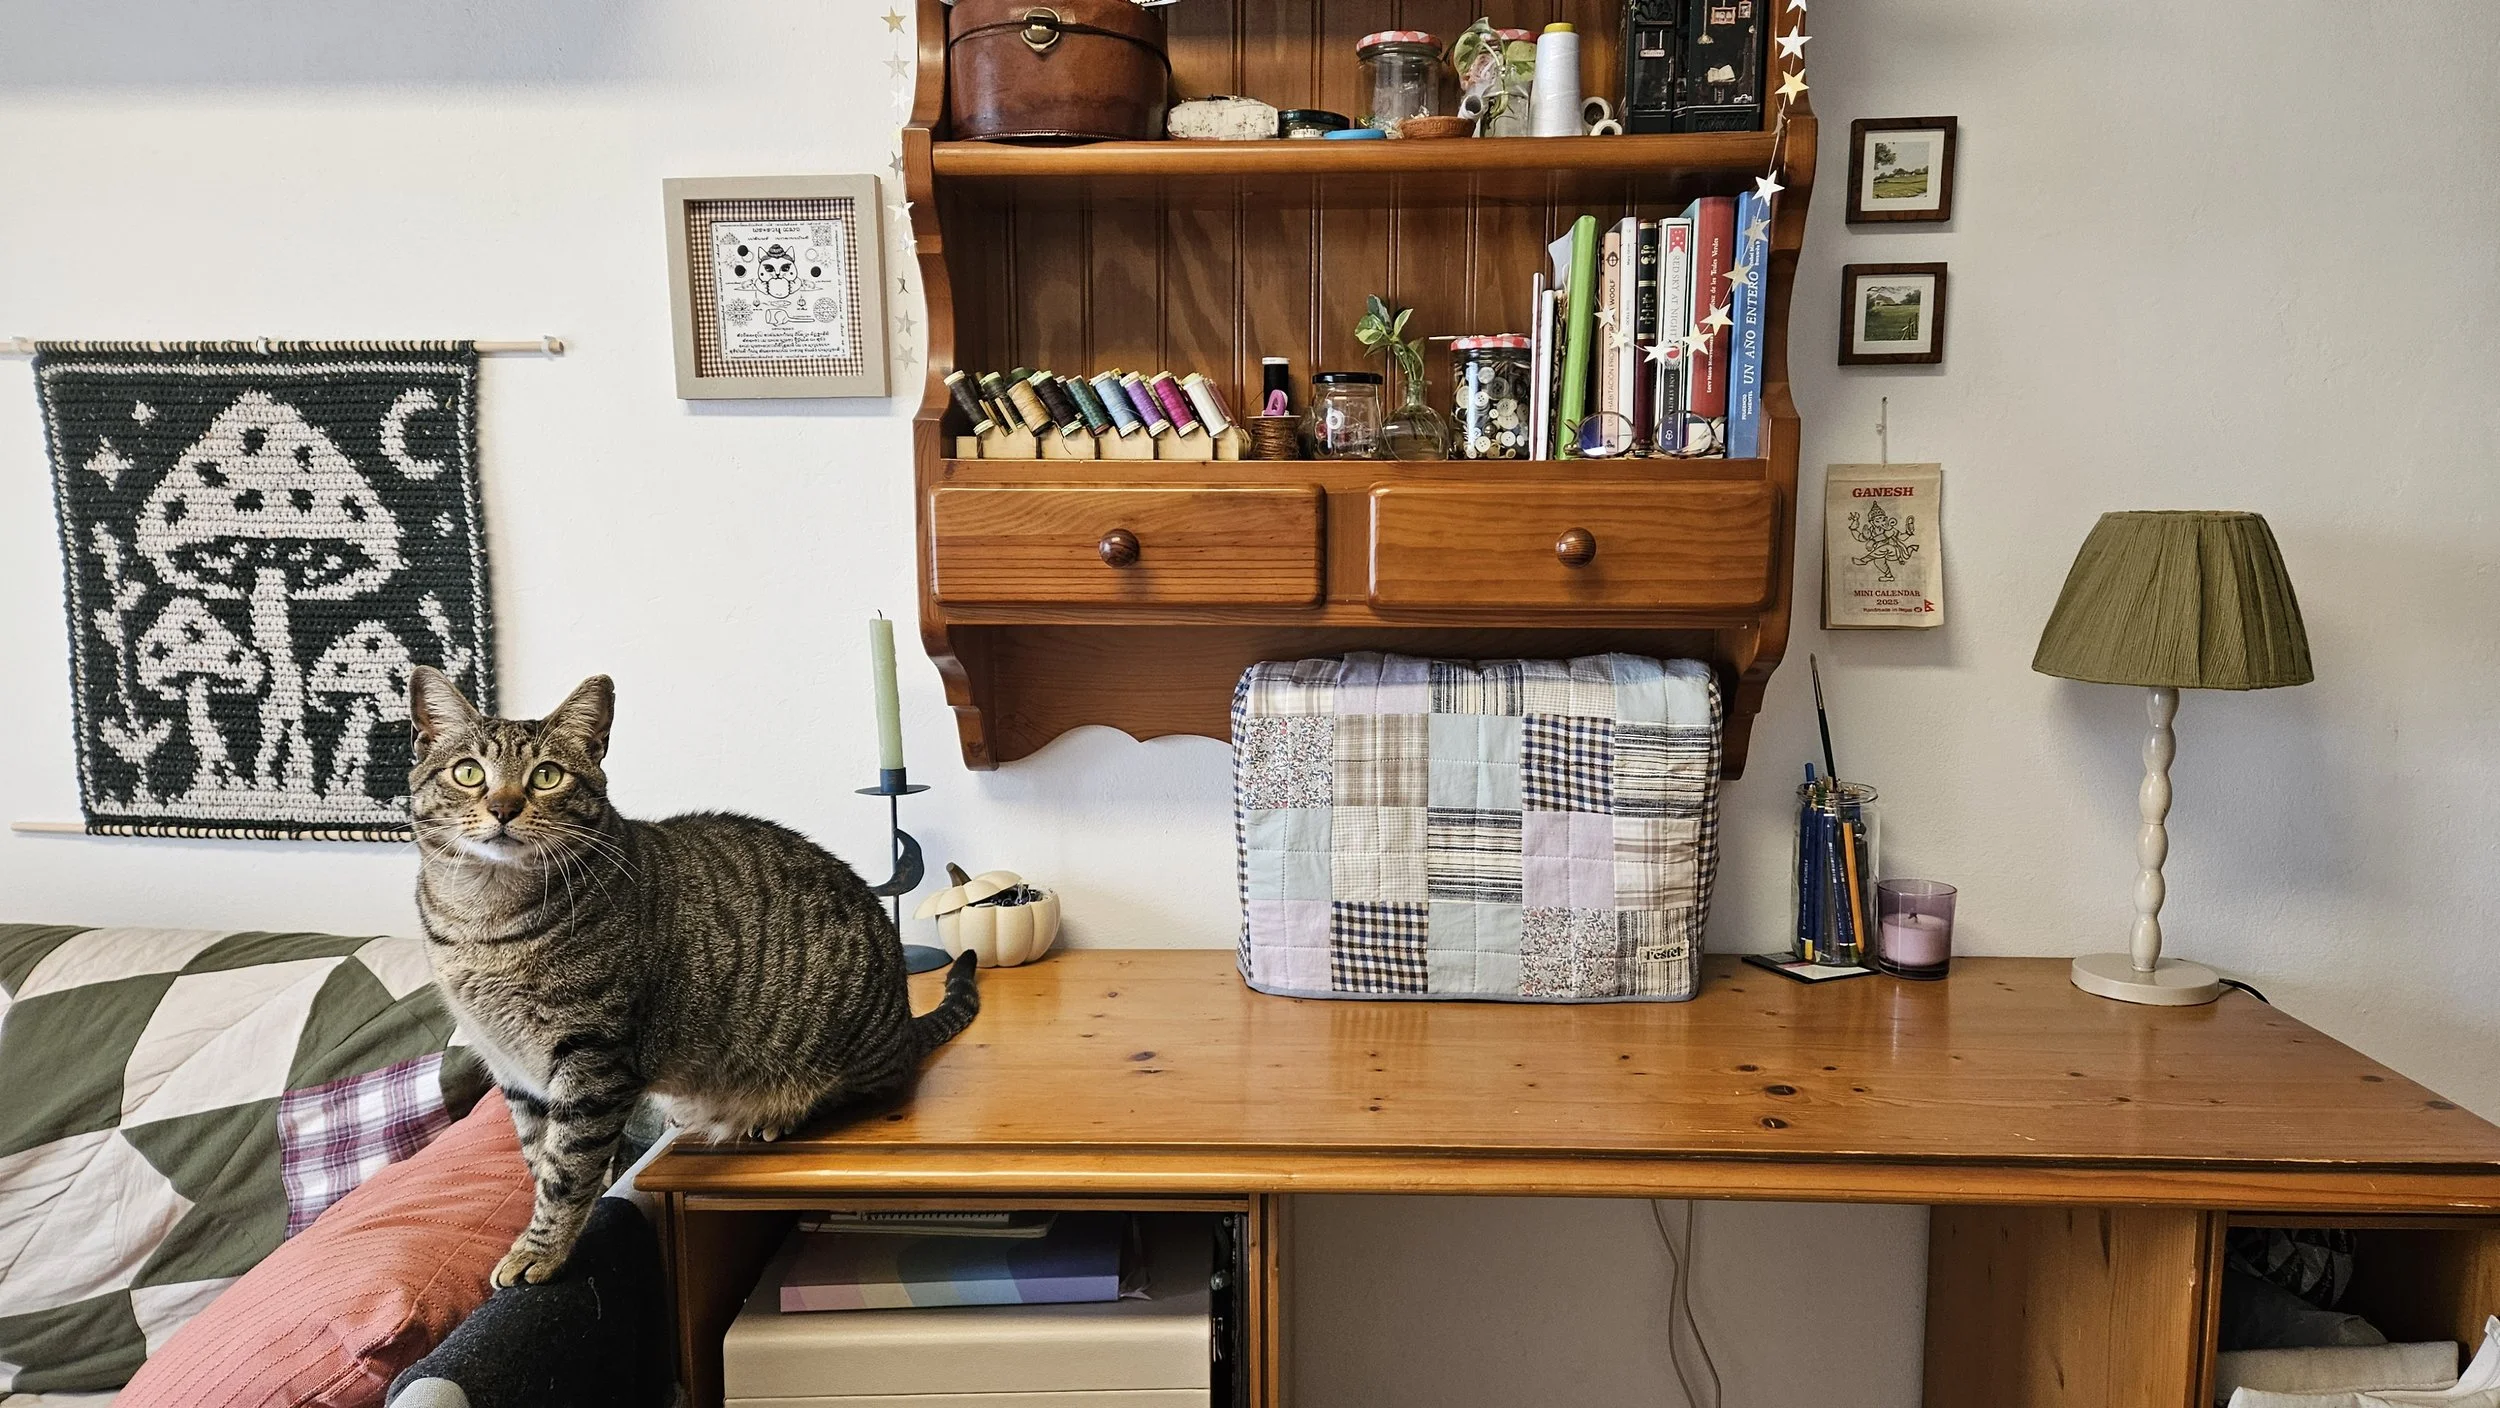
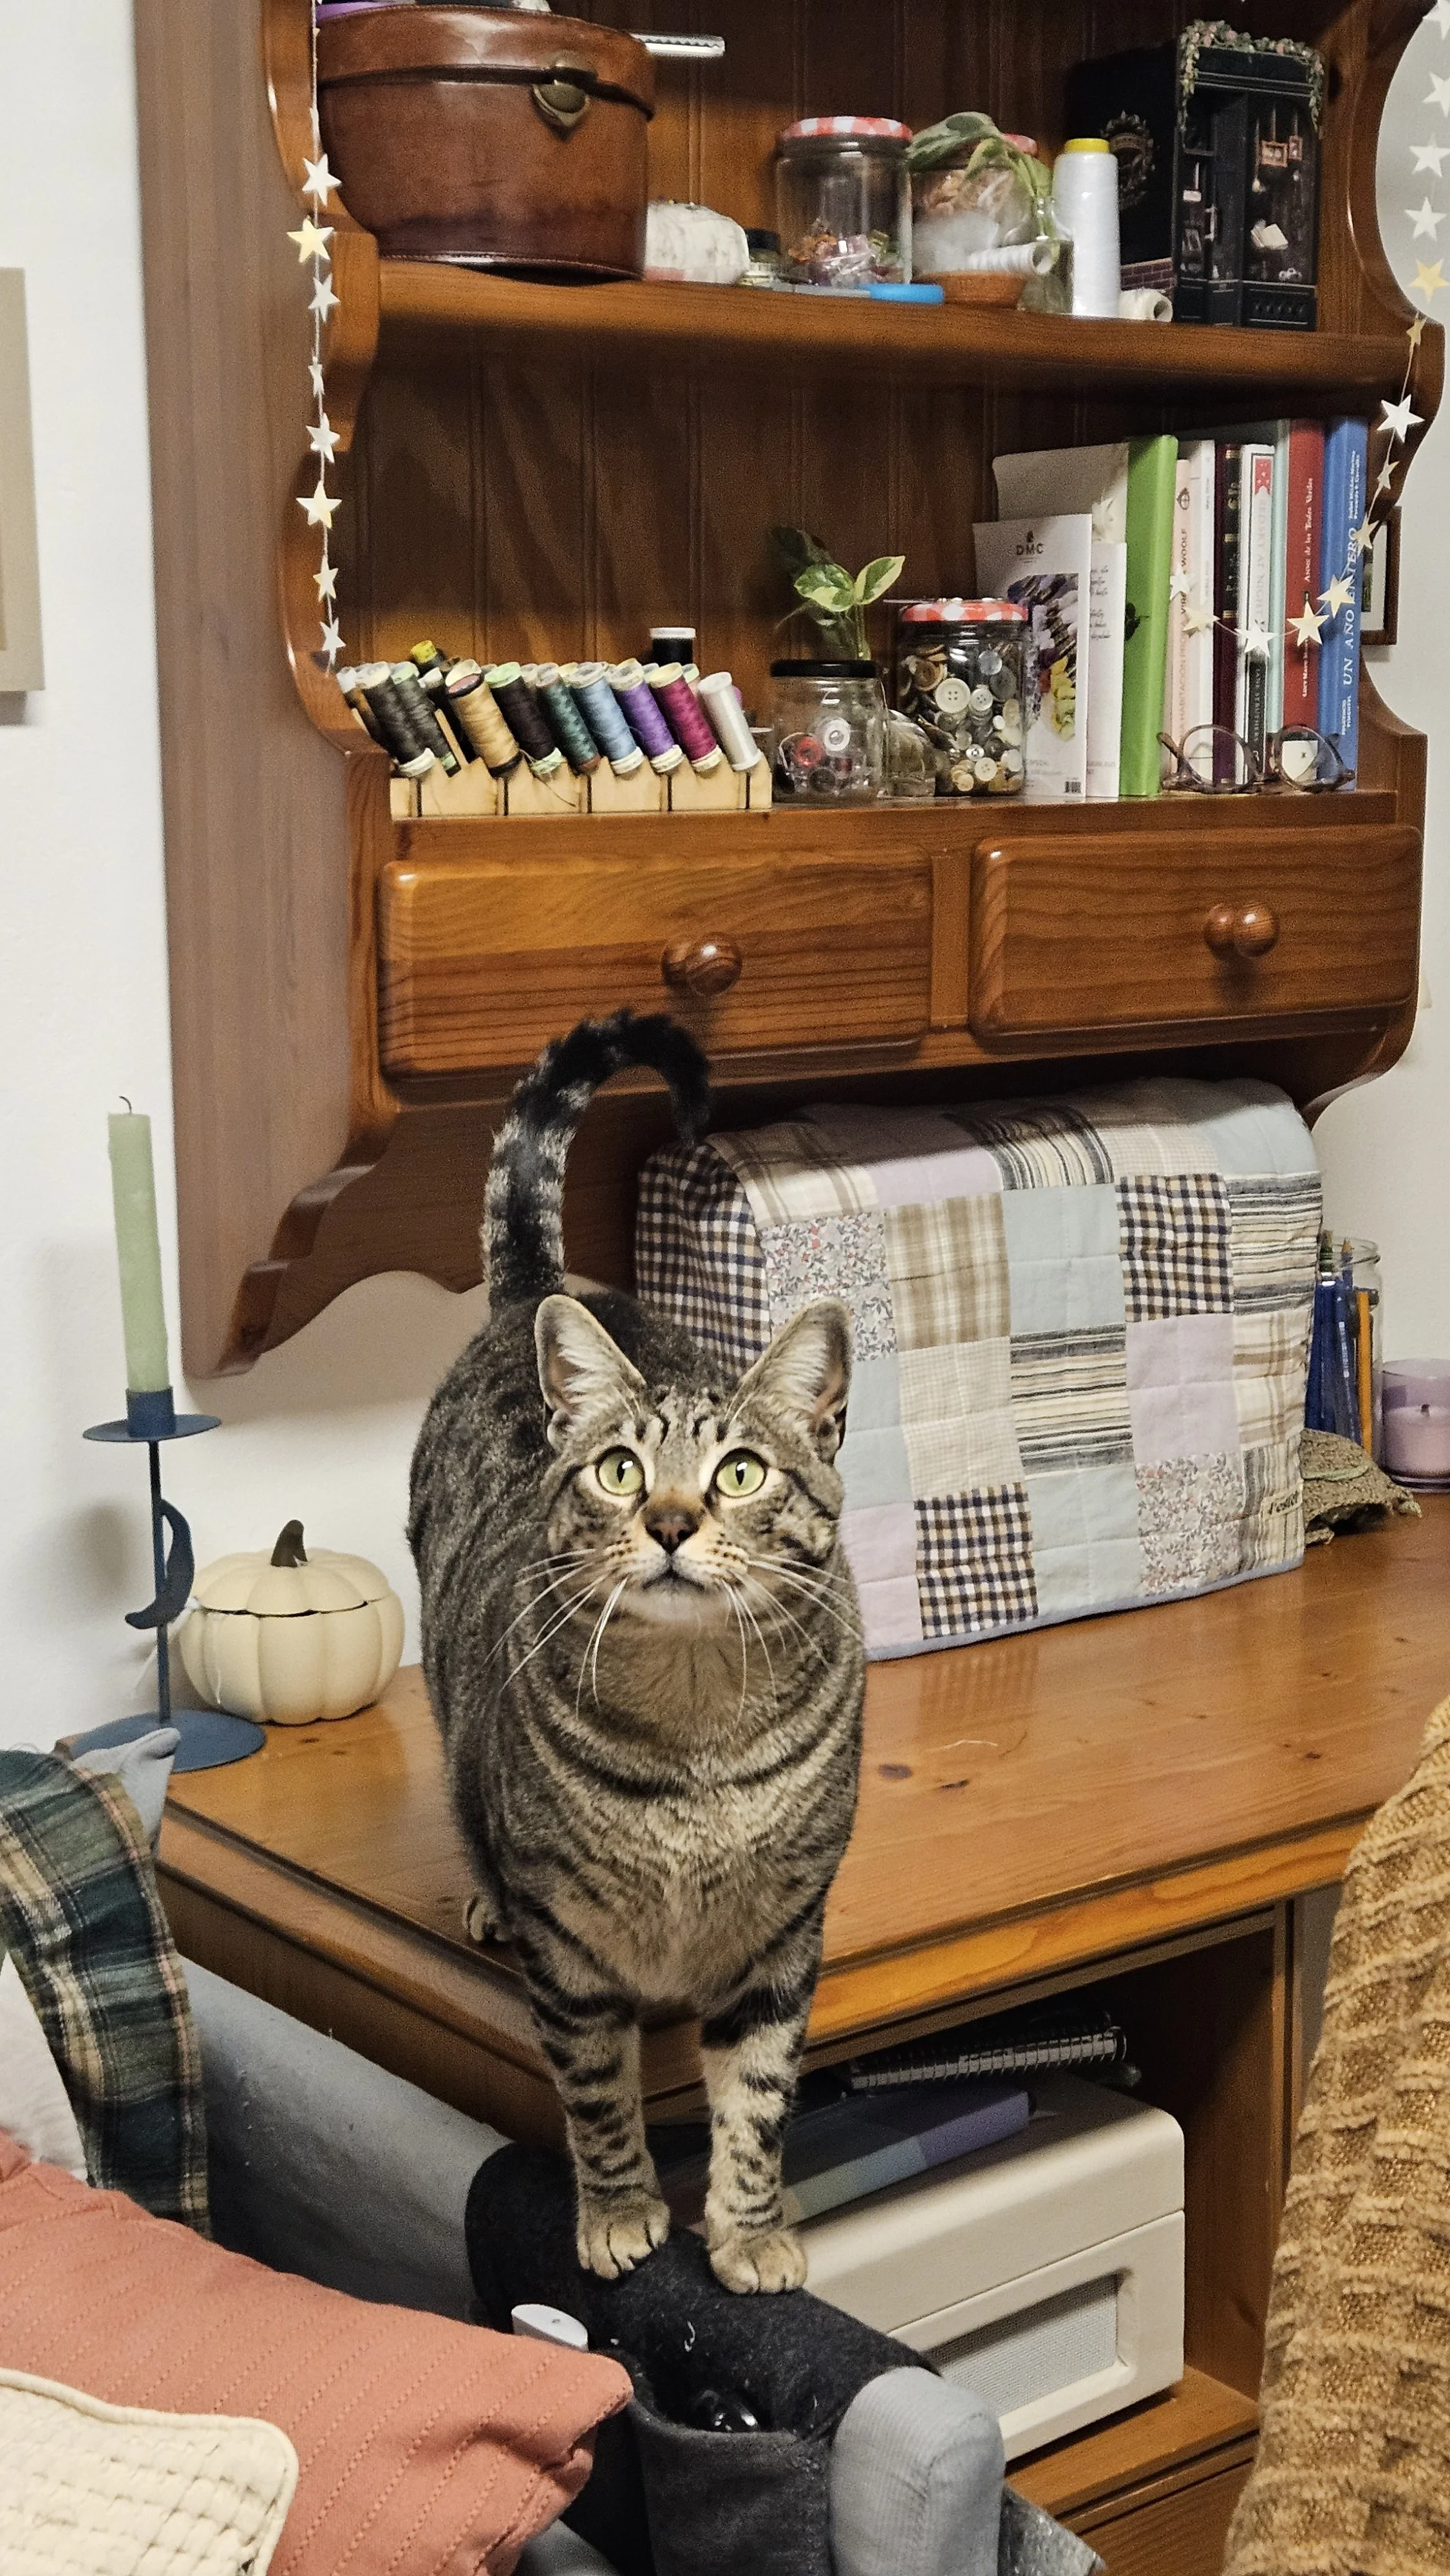
Patchwork Sewing Machine Cover Pattern

Learn how to make a cozy patchwork cover to protect your sewing machine from dust while adding a handmade touch to your workspace. This project is perfect for using fabric scraps and practicing simple patchwork and quilting techniques.
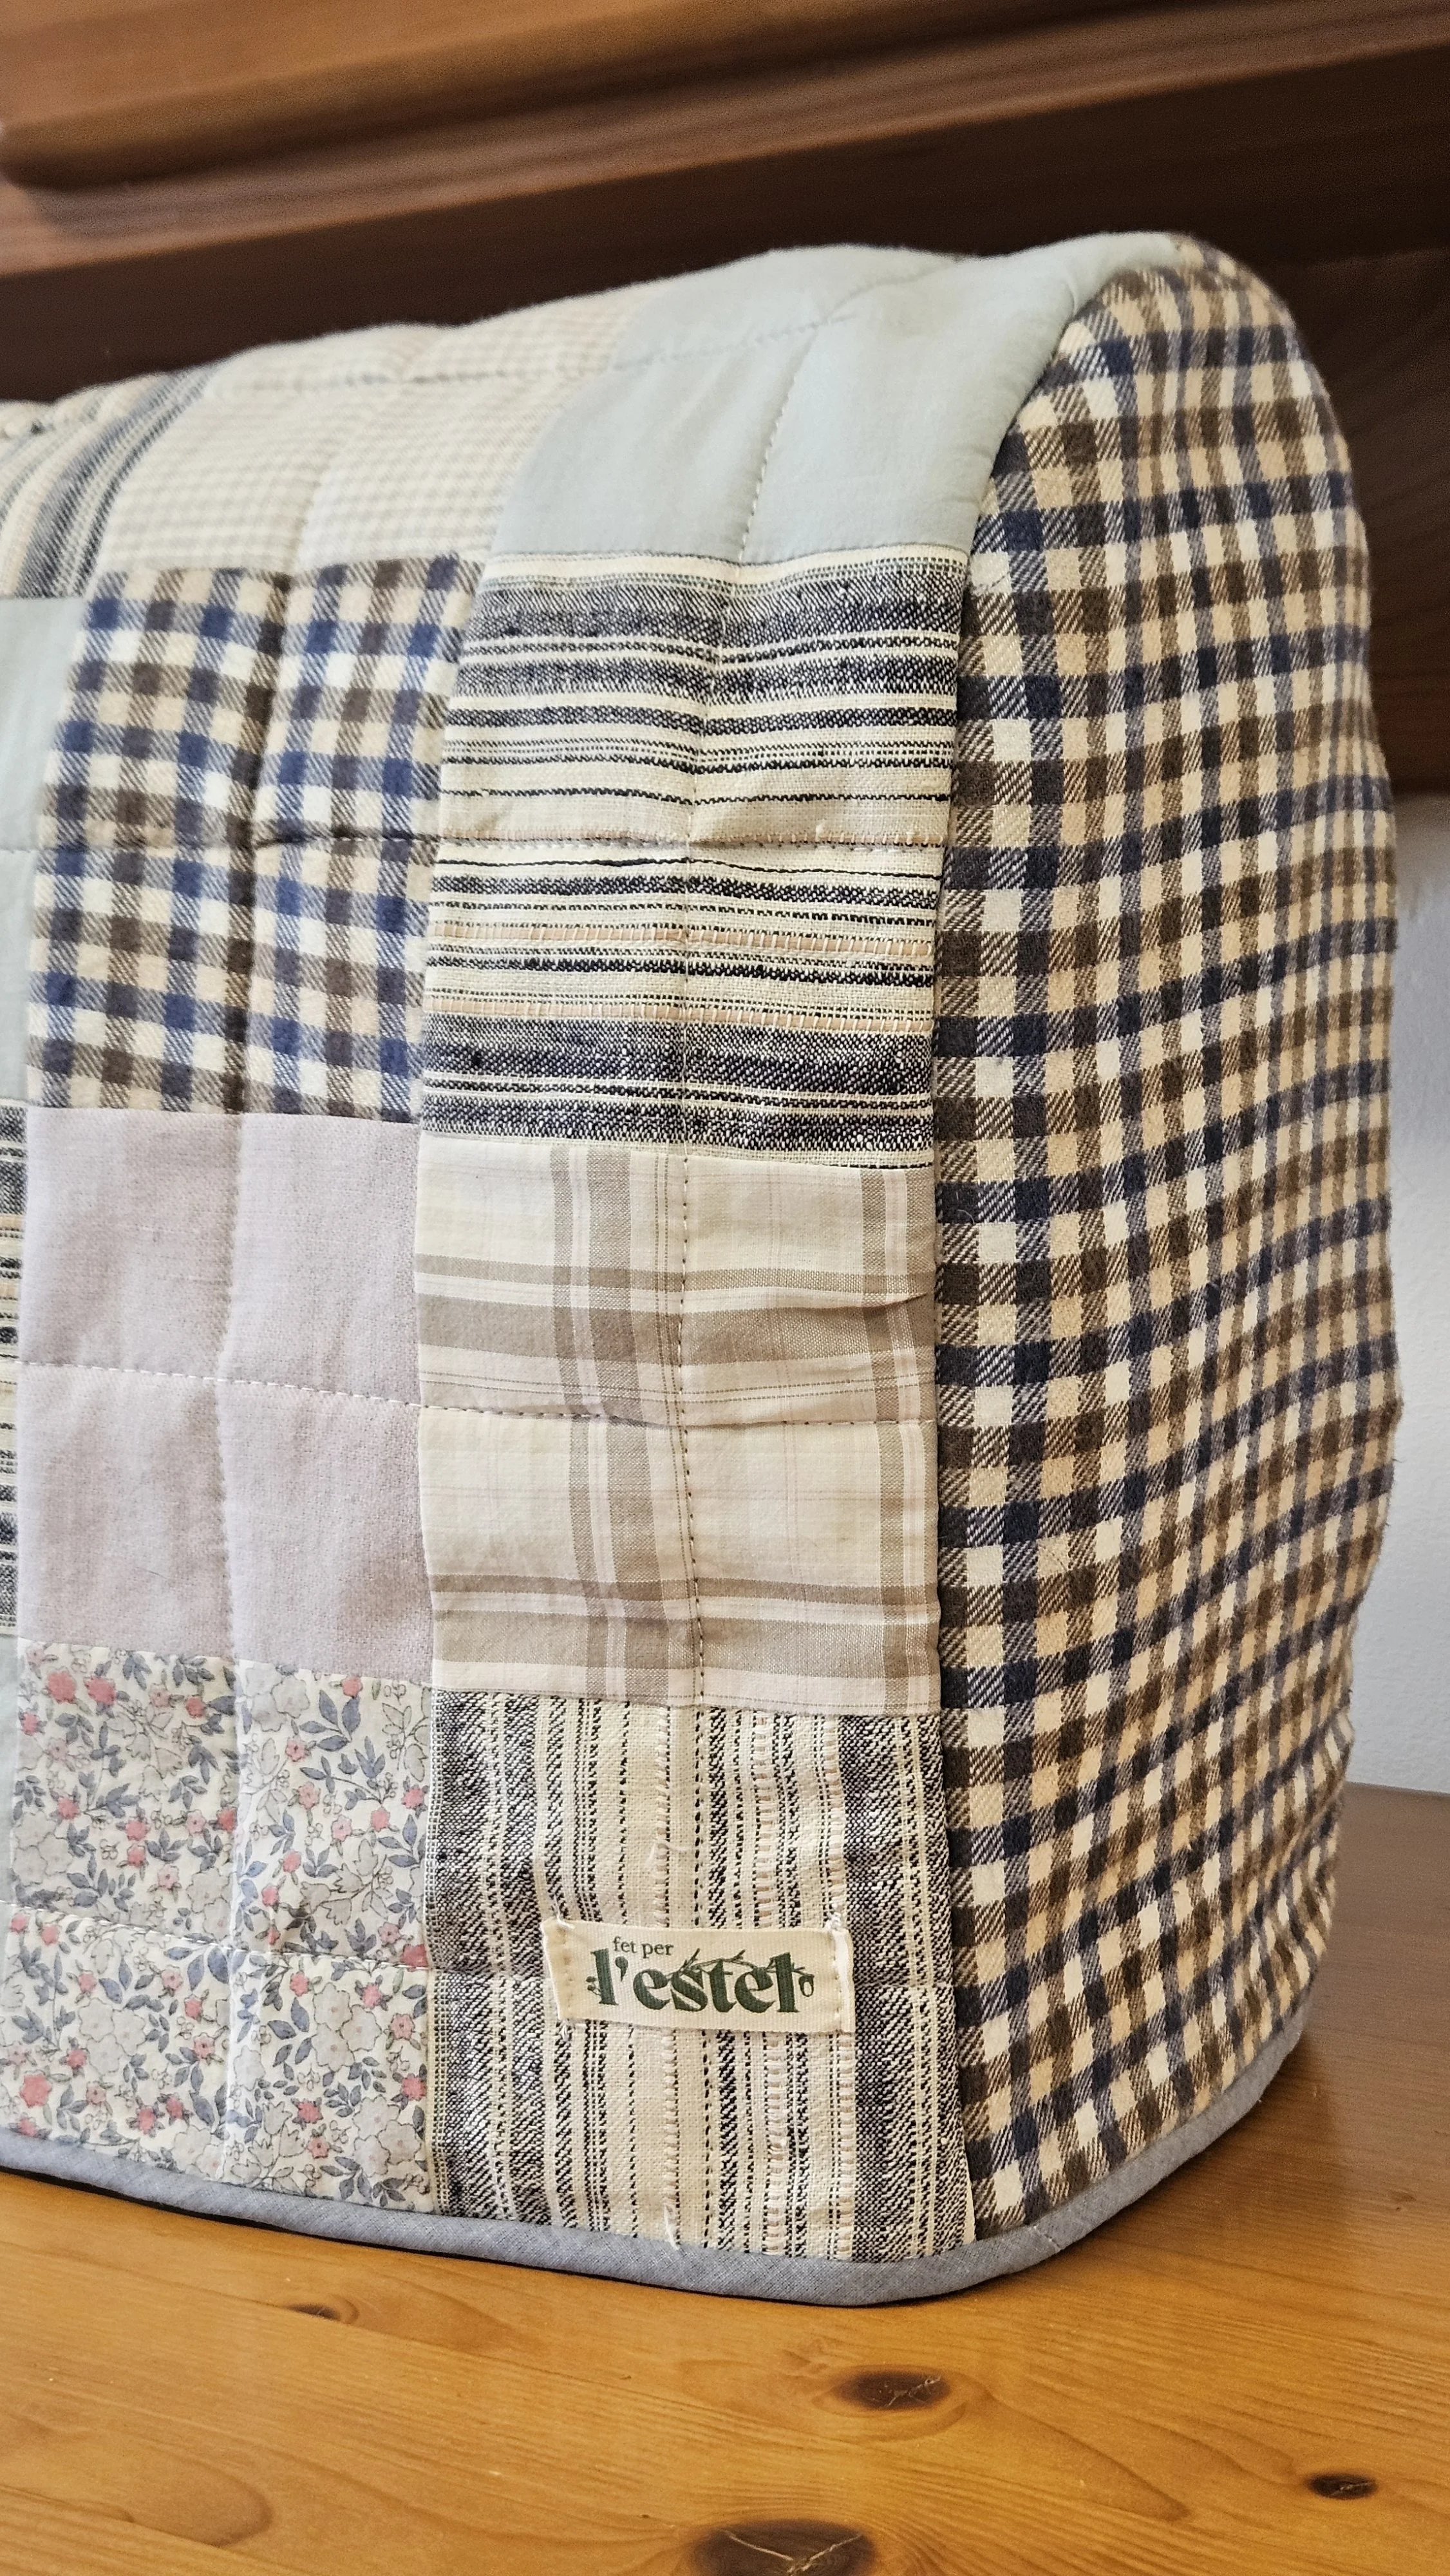
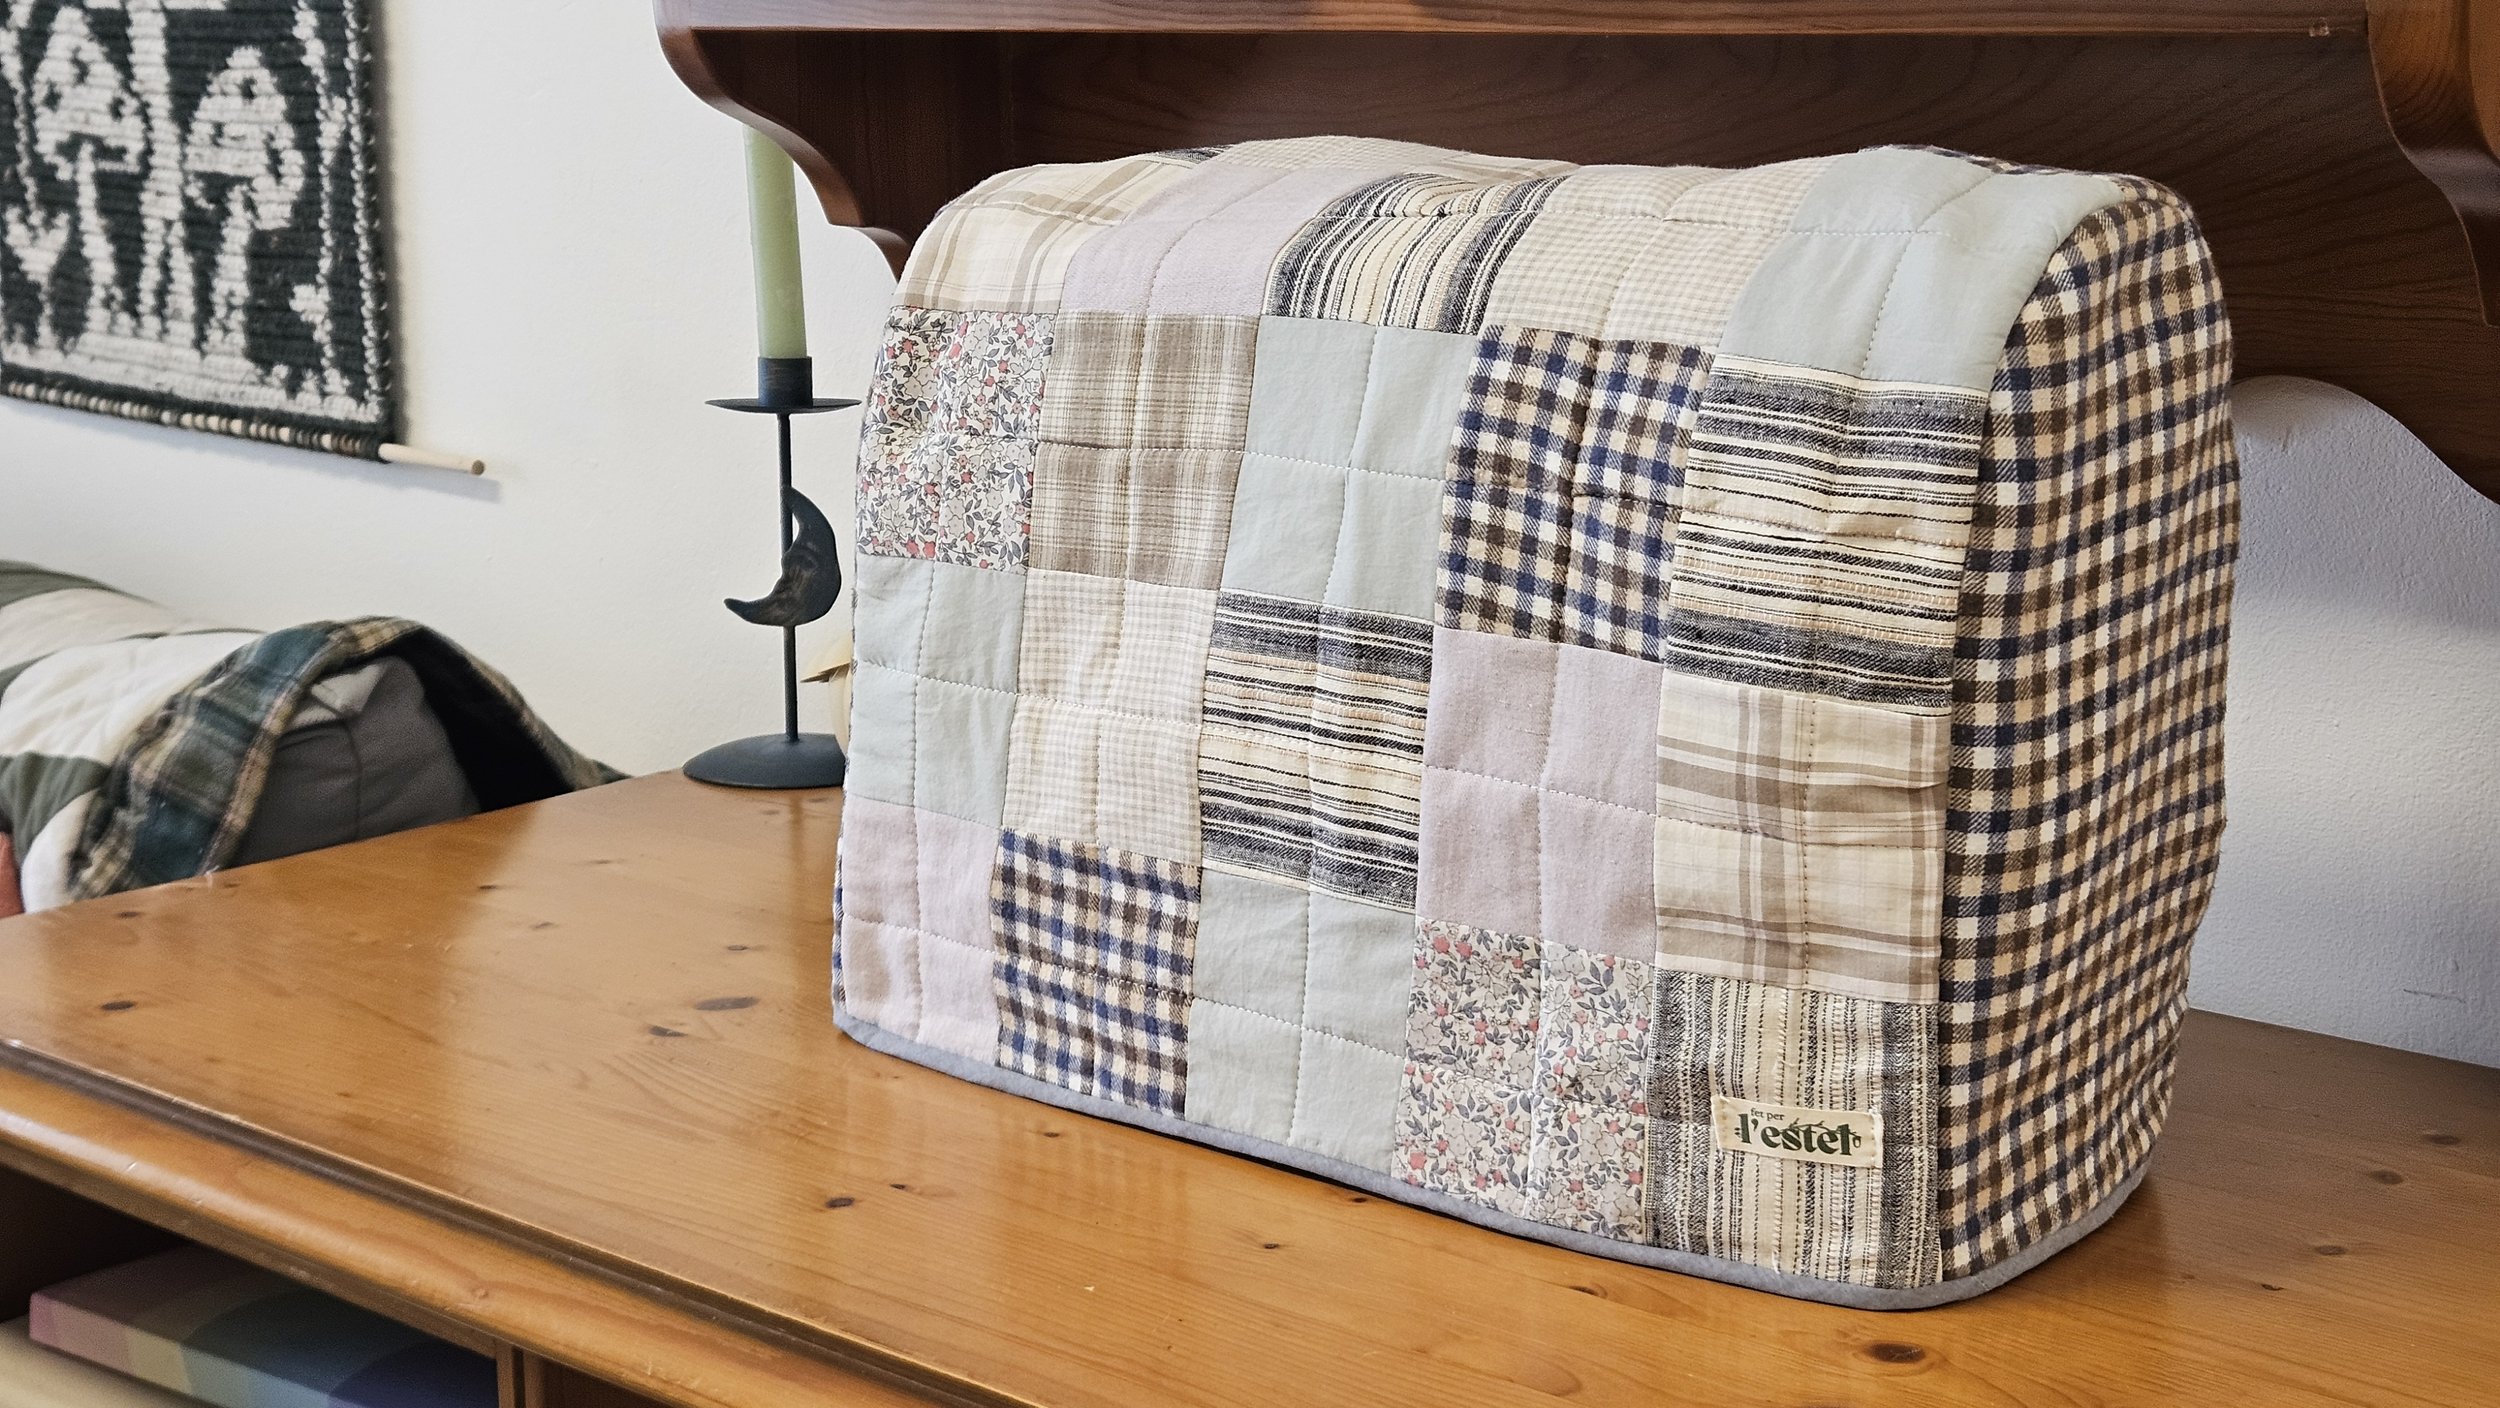
This cover is designed to slip over the machine, with an open bottom and no closures, so it can easily be taken on and off.
Materials
Outer fabric (scrap friendly)
Lining fabric
Batting (lightweight cotton batting recommended)
Bias binding (store-bought or handmade)
Thread
Pins or clips
Optional:
Walking foot for quilting
Skill Level
Beginner – Intermediate
You should be familiar with:
Basic sewing
Patchwork piecing
Quilting layers
Bias binding

Measurements
Every sewing machine is slightly different, so this pattern is custom-sized.
Measure your machine:
Width – side to side
Depth – front to back
Height – table to top of machine
To thes measures, you should add 1 cm of seam allowance, and you can also add 2–3 cm ease to each measurement so the cover slips on comfortably.
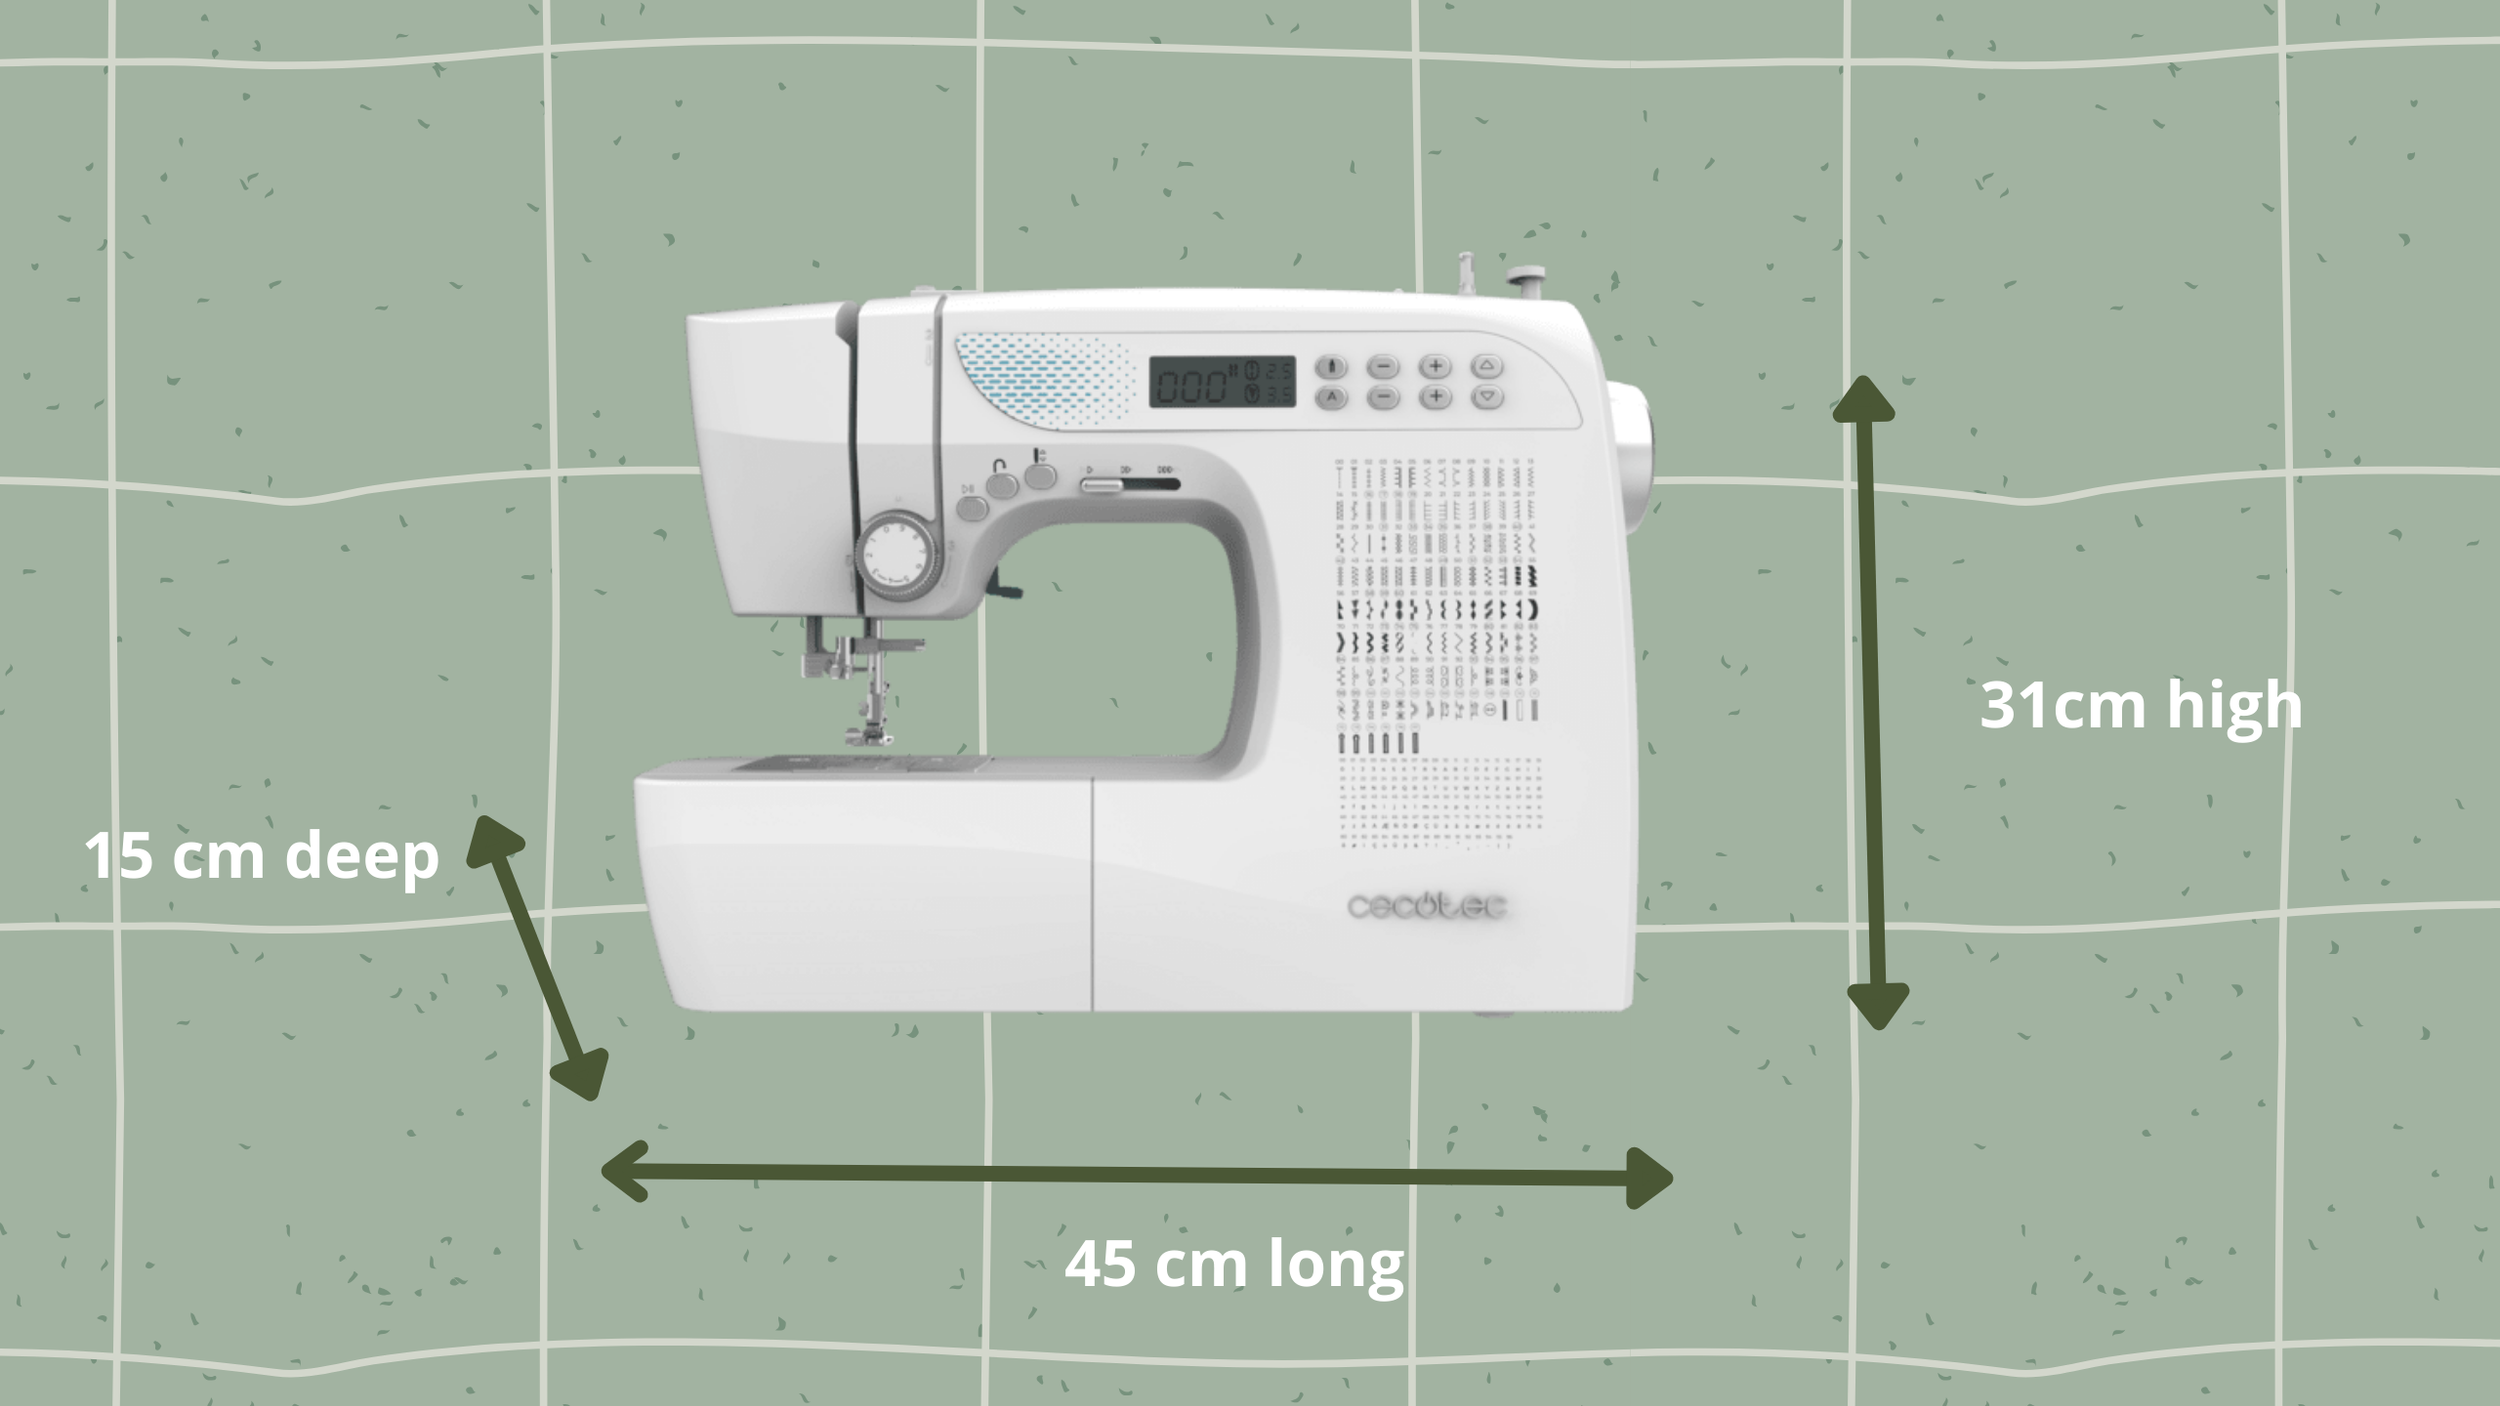
I have a Cecotec Belle Couture 21500
From Scraps to Sewing Machine Cover 🧵
Pattern Pieces
You will need 3 main pieces:
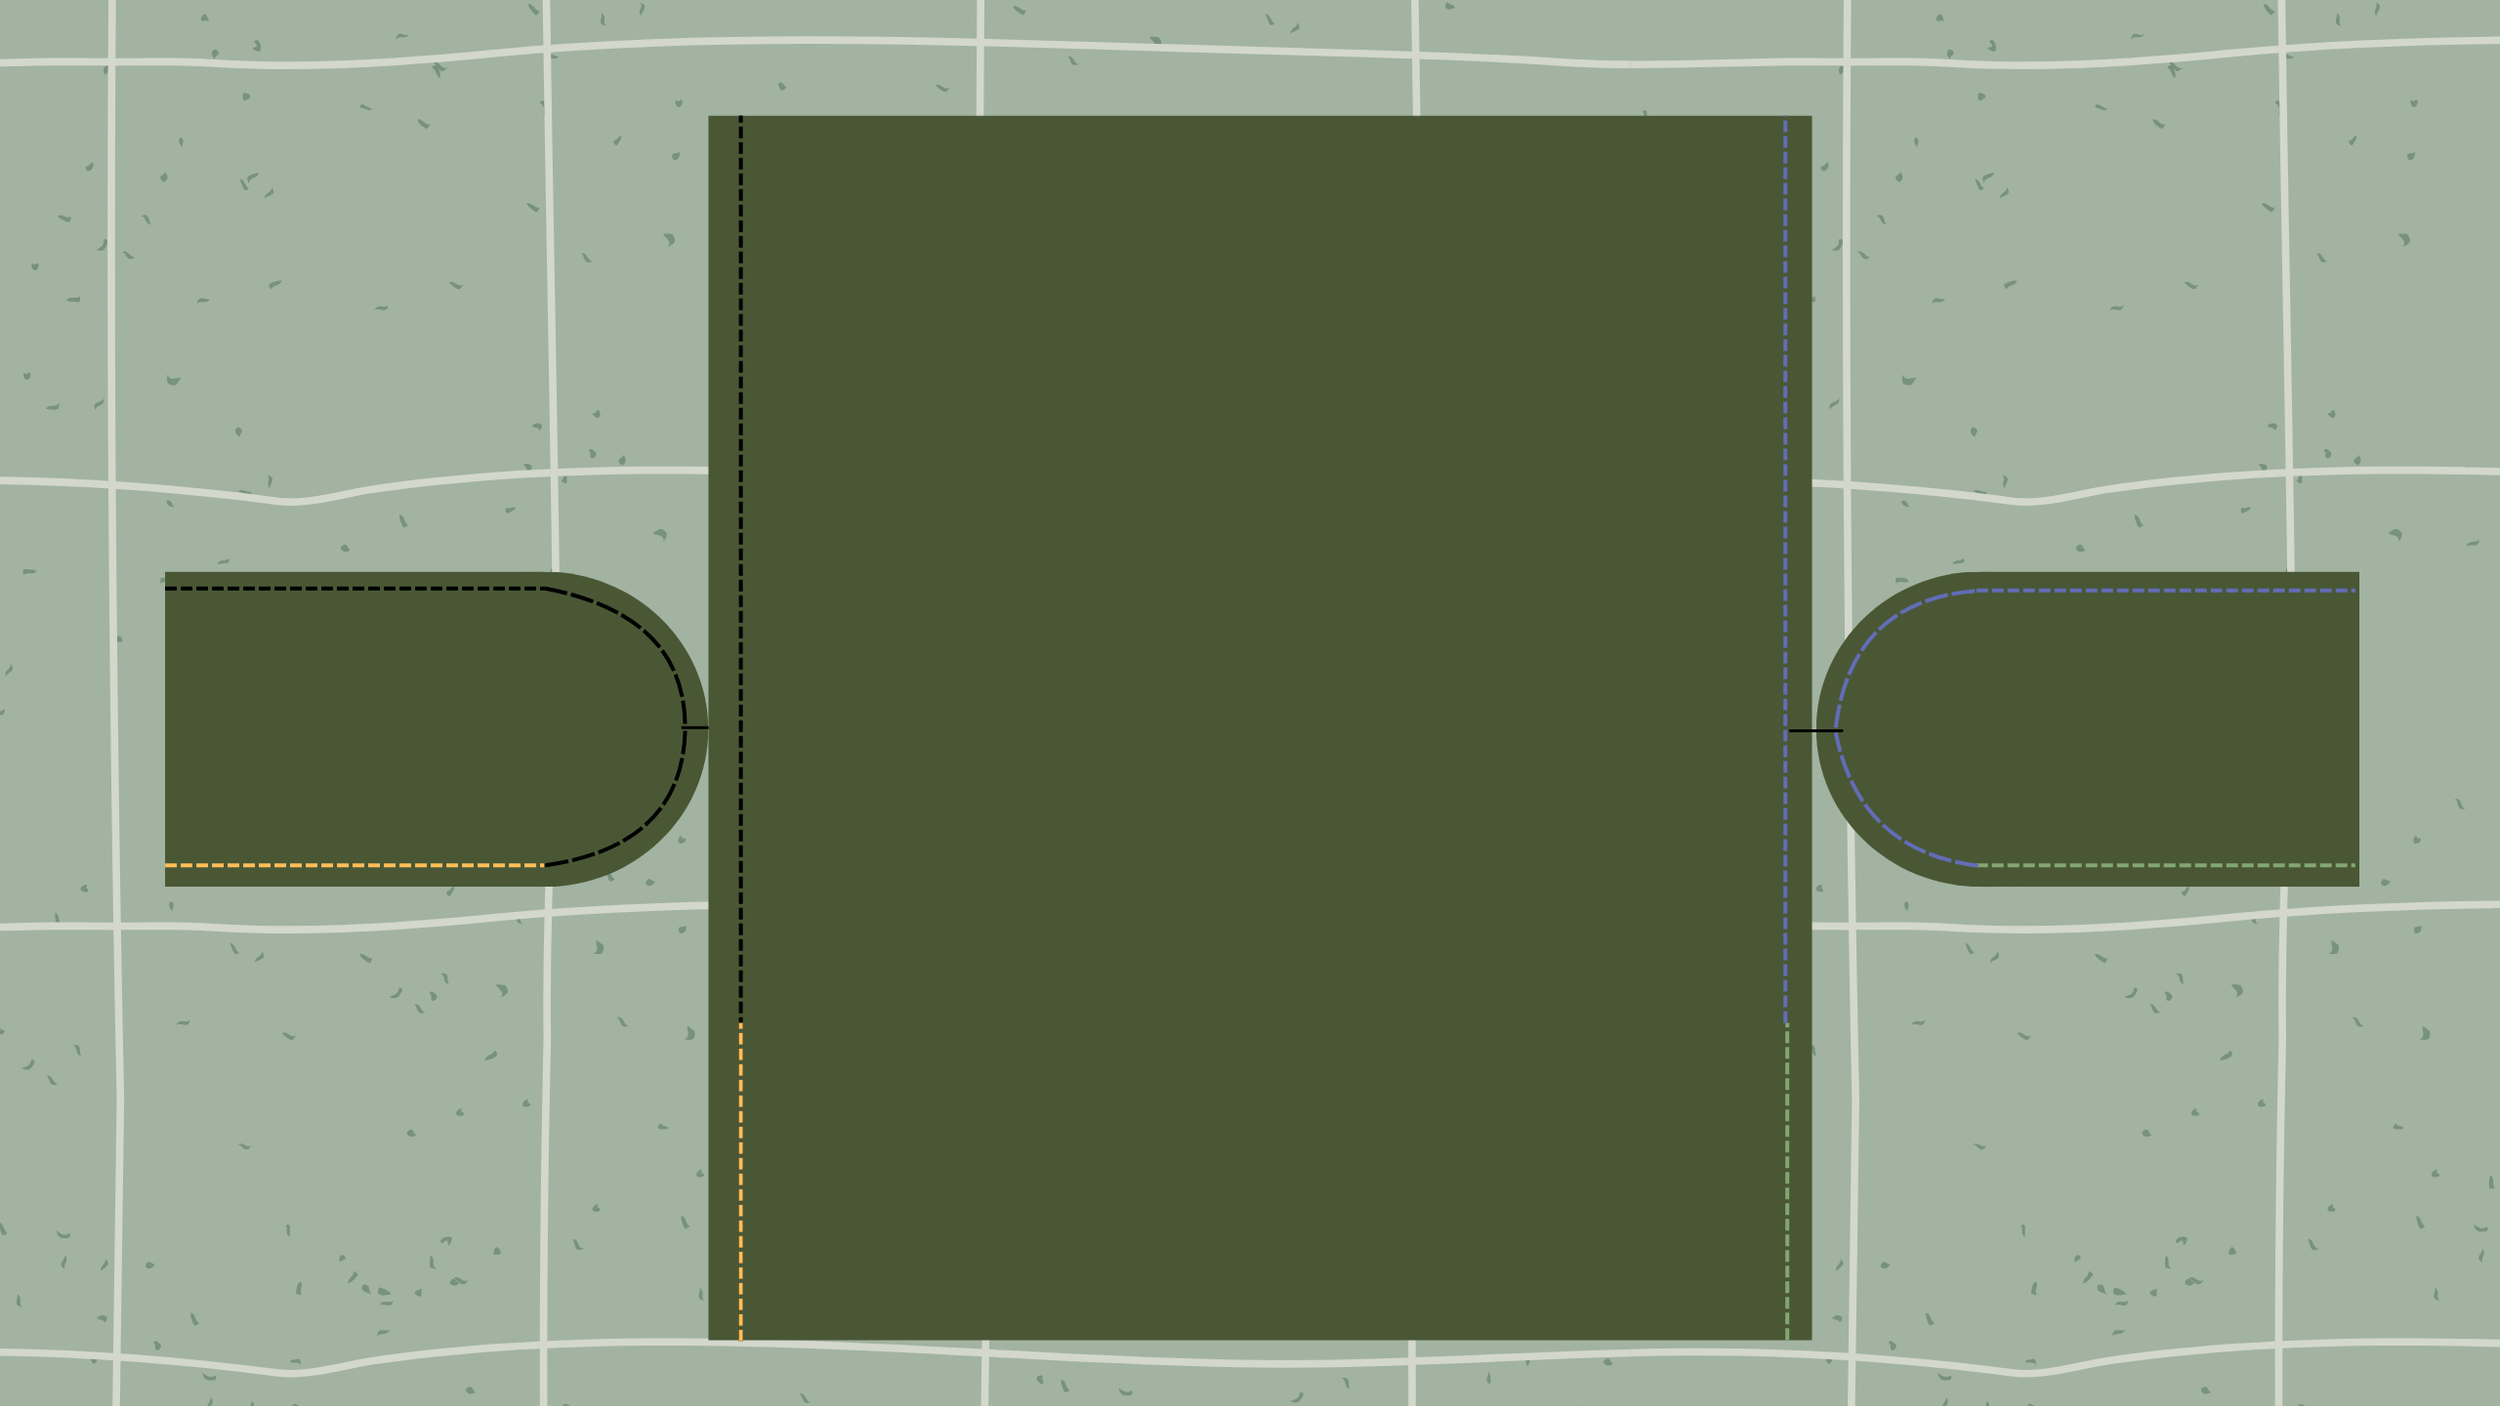
1. Main Panel
Cut 2, one for the lining, and one worked as patchwork
Width: Machine width + seam allowance
Length: Front height + top depth + back height + seam allowance
This piece drapes over the machine from front to back.
2. Side Panels
Cut 4: 2 for the lining, 2 for the outside
Width: Machine depth + seam allowance
Height: Machine height + seam allowance
3. Batting
Cut batting pieces matching each panel.
1 Main Pannel
2 Side Pannels
Notes
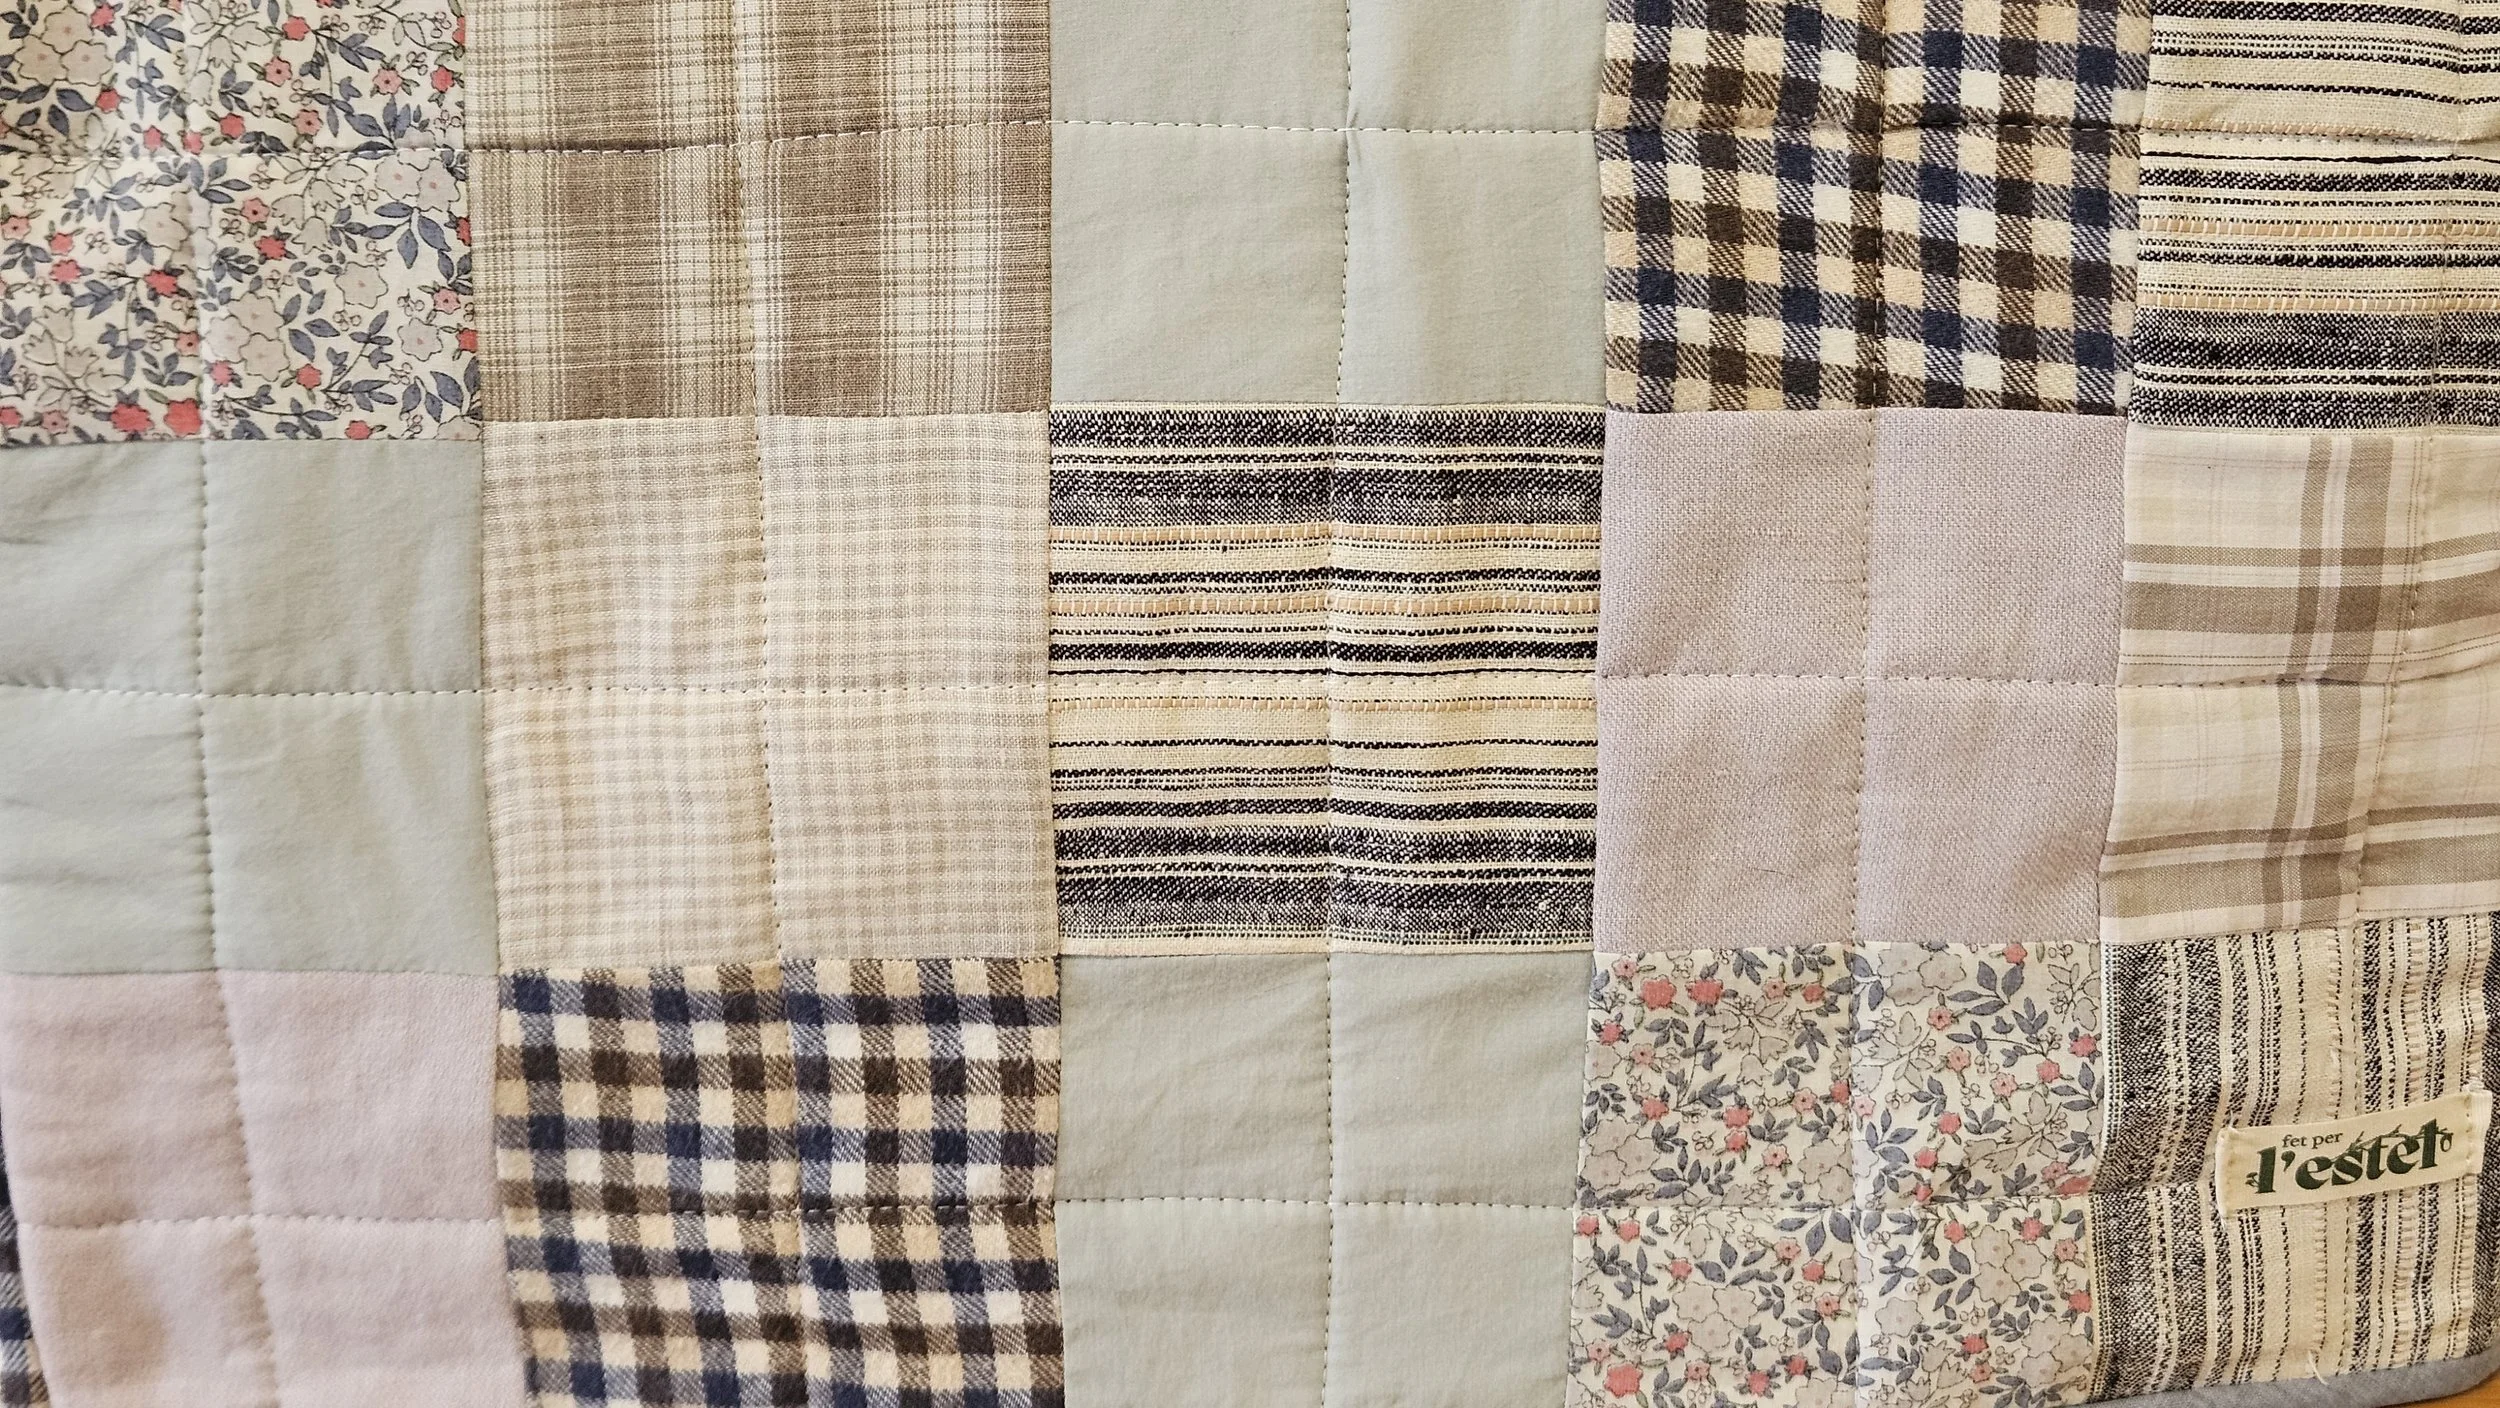
This cover is fully reversible, so you can choose fabrics that create two different looks.
It’s also a great project for:
Using scrap fabrics
Practicing patchwork
Learning bias binding techniques
If you make this sewing machine cover, I would love to see it. Feel free to share your version and tag me with @estelsogo so I can admire your patchwork creations. 💖